
In This Article
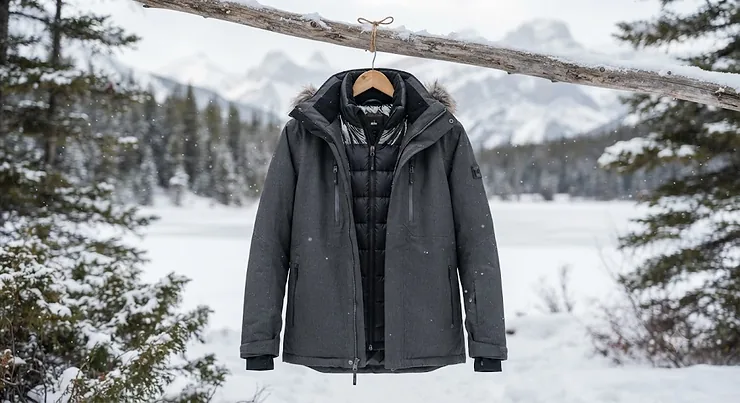
Canadian winter doesn’t do subtlety. One week you’re scraping frost off the windshield during a bone-dry -18°C (0°F) snap in Winnipeg; the next you’re standing in a lukewarm Vancouver drizzle, sweating inside a parka built for the Arctic. That whiplash is exactly the problem an interchange jacket for canadian winters is built to solve.
Here’s the plain-language version: an interchange jacket is a two-piece outerwear system — a waterproof-breathable outer shell that zips to a separate insulated liner — worn together for genuine deep cold, split apart for shoulder-season days, or mixed with other layers depending on what the sky decides to throw at you that morning. One purchase, three wearable configurations, and a comfort range wide enough to cover most of a Canadian year.
That temperature swing isn’t just annoying — it’s the exact mechanism behind Canada’s wind chill index, the scale meteorologists use to describe how much colder moving air makes exposed skin feel. A single heavy parka handles a -30°C wind chill morning beautifully and then turns into a portable sauna the second the mercury climbs back toward freezing. An interchange system sidesteps that trade-off almost entirely, which is exactly why the format has become such a fixture in closets from Halifax to Calgary to Victoria.
Below, we’ve dug into seven real interchange jackets currently sold in Canada, sorted out which interchange jacket brands actually deliver on genuine zip-in liner compatibility rather than just marketing copy, and mapped out how each one handles that maddening cold-to-mild transition wear window every Canadian knows too well — the six or so weeks each fall and spring when you genuinely can’t decide what to wear out the door.
Quick Comparison Table: Interchange Jackets for Canadian Winters
If you’ve got sixty seconds and just want the short version, here’s how the seven jackets in this guide sort by category before we dig into the full breakdown.
| Category | Pick | Shell Type | Liner Type | Best For |
|---|---|---|---|---|
| Best Overall | Columbia Eager Air Interchange 3-in-1 Jacket | Omni-Tech waterproof-breathable | Omni-Heat reflective insulated | Everyday commuting across most of Canada |
| Best Budget | Free Country Ripstop 3-in-1 Systems Jacket | Water-resistant ripstop nylon | Quilted puffer | Cost-conscious first-time interchange buyers |
| Best for Deep Cold | Columbia Whirlibird IV Interchange Jacket | Omni-Tech waterproof-breathable | Omni-Heat Infinity insulated | Prairie and northern winters |
| Best Waterproofing | Helly Hansen Squamish CIS 3-in-1 Jacket | Helly Tech Protection, seam-sealed | Zip-out fleece | Wet coastal B.C. and Atlantic winters |
| Best Down Liner | Eddie Bauer Powder Search 2.0 3-In-1 Down Jacket | WeatherEdge Plus waterproof-breathable | Down-insulated | Extreme cold and extended outdoor exposure |
A pattern jumps out fast: the “best” pick here depends on your postal code almost as much as your budget. Someone shovelling a driveway in Saskatoon needs a fundamentally different liner than someone standing at a bus stop in November rain in Victoria, and the shell technology matters just as much as the insulation rating. We’ll unpack exactly why below, product by product.
💬 Just one click — help other gift-givers find the right glass too! 😊
Top 7 Interchange Jackets for Canadian Winters: Expert Analysis
We focused on real interchange jackets currently sold through amazon.ca, spanning budget, mid-range, and premium tiers, and covering the shell technologies and liner types that actually show up in Canadian winter closets — not just whichever jacket happened to be trending. Here’s the full spec comparison before the individual breakdowns.
| # | Product | Shell Technology | Liner Type | Price Range (CAD) | Best For |
|---|---|---|---|---|---|
| 1 | Free Country Ripstop 3-in-1 Systems Jacket | Water-resistant ripstop | Quilted puffer | around C$90-C$130 | Budget-conscious beginners |
| 2 | Columbia Eager Air Interchange 3-in-1 Jacket | Omni-Tech waterproof-breathable | Omni-Heat reflective | around C$150-C$220 | Everyday city winters |
| 3 | Columbia Whirlibird IV Interchange Jacket | Omni-Tech waterproof-breathable | Omni-Heat Infinity | around C$220-C$300 | Prairie and northern deep cold |
| 4 | Marmot Ramble Component Jacket | Waterproof shell, seam-sealed | Polartec fleece | around C$200-C$260 | Active, high-output winters |
| 5 | The North Face Traverse Triclimate Jacket | DryVent waterproof-breathable | Insulated liner | around C$280-C$360 | Cross-climate travel and durability |
| 6 | Helly Hansen Squamish CIS 3-in-1 Jacket | Helly Tech Protection | Zip-out fleece | around C$260-C$340 | Wet coastal winters |
| 7 | Eddie Bauer Powder Search 2.0 3-In-1 Down Jacket | WeatherEdge Plus | Down-insulated | around C$320-C$420 | Extreme cold, extended exposure |
Looking at that spread, there’s roughly a C$300 gap between the cheapest and priciest option, and it tracks almost exactly with shell membrane quality and liner insulation type — ripstop-and-puffer combinations sit at the bottom of the range, proprietary waterproof-breathable membranes paired with down sit at the top. Prices shown are approximate ranges only; always check current pricing and availability directly on Amazon.ca before buying, since retail pricing shifts constantly and none of these are “sale” claims.
1. Free Country Ripstop 3-in-1 Systems Jacket — budget-friendly entry into interchange layering
The standout here isn’t performance — it’s the price of admission, letting you try the interchange format before committing three hundred dollars to a jacket you might not end up using in its three-in-one form. The ripstop nylon shell resists tearing on fence lines, car door edges, and dog leashes better than plain nylon, and its water-resistant coating sheds light snow and drizzle, though it’s not built around a technical waterproof-breathable membrane the way pricier shells are. The quilted puffer liner zips out cleanly and works as a stand-alone jacket for quick errands or a chilly office.
Based on the spec sheet, this is realistically a shoulder-season and mild-winter performer rather than a sustained deep-freeze jacket — it’s the kind of pick that makes sense for southern Ontario or the Lower Mainland more than for a Winnipeg February. Reviewers commonly describe it as solid value for the price, though a recurring theme in owner feedback is that the shell’s water resistance fades faster with repeated wear than what you’d get from a branded technical membrane, meaning periodic reproofing matters more here than on the premium picks.
Pros:
- ✅ Affordable entry point into interchange layering
- ✅ Lightweight liner doubles as a stand-alone puffer
- ✅ Wide range of sizes and colourways available
Cons:
- ❌ DWR coating needs more frequent reproofing than technical shells
- ❌ Not rated for extended exposure in heavy wet snow
At around C$90-C$130, this is a genuinely reasonable value if your winter needs are moderate and you mainly want a light shell plus a warm liner for daily errands, not hours of sustained sub-zero exposure.

2. Columbia Eager Air Interchange 3-in-1 Jacket — best all-rounder for everyday Canadian winters
What stands out first is how balanced this one is across the board, which is exactly why it lands as the overall pick. The Omni-Tech waterproof-breathable membrane keeps slush and rain out while venting sweat during a brisk walk or a round of shovelling, and the taped seams mean you’re not dealing with slow leaks at the shoulders after a wet afternoon. The Omni-Heat liner uses a reflective thermal lining rather than pure bulk to trap warmth, so it reads warmer than its actual weight would suggest.
What most buyers overlook about this model is how much the adjustable hood and cuffs do for real-world comfort — sealing out drafts matters as much as raw insulation when you’re standing at a bus stop. This is a genuinely solid do-everything pick for anyone commuting through a mid-latitude Canadian city — Toronto, Montreal, Calgary — who wants one jacket to carry them from October through March. Reviewers frequently highlight the roomy fit over sweaters and mid-layers, though a recurring complaint is that the liner alone runs a touch short in the torso for taller frames.
Pros:
- ✅ Reliable Omni-Tech waterproof-breathable shell
- ✅ Reflective Omni-Heat liner adds warmth without bulk
- ✅ Adjustable hood and cuffs seal out cold drafts
Cons:
- ❌ Liner runs short in the torso for taller builds
- ❌ Zippers can feel stiff in very cold temperatures
At around C$150-C$220, this is one of the more balanced value picks in Columbia’s own interchange lineup, and arguably the safest first purchase if you’re new to the category.
3. Columbia Whirlibird IV Interchange Jacket — heavier insulation for deep-freeze days
The headline feature is the Omni-Heat Infinity liner, which carries noticeably more loft than the Eager Air’s liner and is clearly engineered around sustained sub-zero exposure rather than occasional cold snaps. The same Omni-Tech waterproof-breathable shell handles wet snow and slush, but here it’s paired with a storm flap and an adjustable hem specifically meant to seal out wind at the waist — a detail that matters far more than it sounds once wind chill gets involved.
Here’s what the spec sheet won’t tell you outright: the extra loft means less bulky base-layering underneath, which is genuinely useful when you’re already wearing a sweater and don’t want to feel like the Michelin Man. This is best suited to Prairie and northern climates — Winnipeg, Saskatoon, Edmonton — where wind chill regularly plunges past -30°C for days at a stretch, rather than milder coastal winters where it would run too warm. Owners commonly cite genuine warmth in extreme cold as the standout, though some mention the extra insulation makes the liner uncomfortably warm for indoor wear or unseasonably mild days.
Pros:
- ✅ Higher-loft liner built for genuine deep freeze
- ✅ Storm flap and adjustable hem block drafts effectively
- ✅ Durable exterior fabric holds up to daily wear
Cons:
- ❌ Bulkier liner is less versatile on mild days
- ❌ Heavier overall jacket weight than the Eager Air
At around C$220-C$300, the price bump over the Eager Air is easy to justify if you regularly face extended sub-zero wind chill rather than occasional cold snaps.
4. Marmot Ramble Component Jacket — best Polartec fleece liner for active layering
The Polartec fleece liner is what sets this one apart, and it’s a deliberate trade-off: fleece breathes dramatically better than a puffer or down liner during aerobic activity, which matters if your winter involves actual movement rather than standing still. The waterproof, seam-sealed shell handles wet snow reliably, and the hood is cut generously enough to layer over a toque without feeling restrictive.
Based on the spec comparison, this is the jacket built for people who generate their own heat — shovelling with intent, snowshoeing, brisk dog walks in fresh powder — rather than people whose main winter activity is waiting for transit. Reviewers often praise the fleece liner’s breathability specifically during high-output activity, calling out that it doesn’t leave you drenched in sweat the way an insulated puffer liner sometimes does; the trade-off, noted occasionally in owner feedback, is that the shell’s DWR coating needs periodic reproofing after heavy seasonal use, same as most technical shells.
Pros:
- ✅ Excellent breathability for high-output winter activity
- ✅ Fleece liner doubles as a warm stand-alone mid-layer
- ✅ Adjustable, storm-ready hood fits over a toque
Cons:
- ❌ Less warm than down or synthetic liners when stationary
- ❌ Shell needs periodic DWR reproofing over time
At around C$200-C$260, this is the strongest pick here if movement, not standing still, defines your typical Canadian winter.
5. The North Face Traverse Triclimate Jacket — most versatile shell-and-liner combo
The DryVent waterproof-breathable shell is the standout, built as a reliable two-layer membrane that handles sustained rain and wet snow rather than just light drizzle, and the shell-liner separation is clean enough that the true 3-in-1 versatility actually holds up in daily use rather than becoming a gimmick that never gets used. That matters more than it sounds — plenty of interchange jackets technically separate but practically stay zipped together because the liner alone looks unfinished; this one doesn’t have that problem.
What most buyers overlook is how well this handles travel between climate zones within the same trip — a damp coastal morning in Vancouver followed by a cold evening inland is exactly the scenario this jacket is built around. Owners frequently cite durability and the brand’s longstanding reputation as reasons they’d buy again, while a recurring critique in feedback is the noticeably higher price relative to Columbia’s comparable interchange lines for what amounts to a similar core concept.
Pros:
- ✅ Dependable DryVent shell handles sustained wet weather
- ✅ Liner functions well as a stand-alone shoulder-season jacket
- ✅ Recognizable, durable construction built to last seasons
Cons:
- ❌ Premium price relative to comparable interchange options
- ❌ Fit runs closer to athletic, less room over bulky layers
At around C$280-C$360, this is a premium buy, but one that tends to pay off in longevity for anyone who wants a jacket that’ll still look presentable in three winters.
6. Helly Hansen Squamish CIS 3-in-1 Jacket — best for wet coastal winters
Helly Tech Protection is the story here — a fully seam-sealed, waterproof, windproof, breathable shell built out of the brand’s Norwegian marine and workwear heritage, which means it’s genuinely engineered around sustained wet exposure rather than occasional drizzle. The zip-out fleece liner adds warmth without changing that core wet-weather focus.
Here’s what most buyers overlook about coastal winters: the real enemy in Vancouver, Victoria, or Atlantic Canada usually isn’t temperature, it’s humidity and sustained rain, and a shell rated for dry cold can genuinely underperform in those conditions. This is the clear pick when your winter looks like rain more often than snow. Reviewers commonly note the shell stays genuinely dry through sustained downpours in a way lighter DWR-only shells don’t, though some mention the fleece liner alone isn’t warm enough for interior Canada’s dry deep cold, which tracks with the shell-first design philosophy.
Pros:
- ✅ Standout waterproofing for sustained wet conditions
- ✅ Fully seam-sealed construction, not just taped seams
- ✅ Fleece liner works well as a stand-alone piece
Cons:
- ❌ Fleece liner underpowered for extreme dry cold
- ❌ Higher price than comparable synthetic-insulated competitors
At around C$260-C$340, this is worth the premium specifically if your winter is defined by rain and humidity rather than dry sub-zero cold.
7. Eddie Bauer Powder Search 2.0 3-In-1 Down Jacket — premium down-liner pick for extreme cold
The down-insulated liner is what separates this from every other jacket on this list — down offers the best warmth-to-weight ratio of any insulation type here, which matters a lot once you’re already layering a shell over a liner and don’t want the combination to feel like a sleeping bag with sleeves. The WeatherEdge Plus shell handles sustained snow exposure reliably, and the liner packs down small enough to stuff into a carry-on.
What most buyers overlook about down liners specifically: warmth-to-weight is exceptional right up until the down gets soaked, at which point insulating power drops fast — a known trade-off of down versus synthetic fill, not a flaw unique to this jacket. This is best suited to genuinely extreme cold — northern communities, ice fishing, extended outdoor exposure — where warmth-to-weight matters more than wet-weather resilience. Owners frequently highlight the liner’s warmth relative to its packable weight as the standout feature, while some reviewers note, consistent with how down performs generally, that soaking it through noticeably reduces its warmth until it’s fully dried out.
Pros:
- ✅ Exceptional warmth-to-weight ratio from the down liner
- ✅ WeatherEdge Plus shell handles sustained snow exposure well
- ✅ Liner packs down small for travel or storage
Cons:
- ❌ Down liner loses insulating power if soaked through
- ❌ Premium price tag among the highest in this lineup
At around C$320-C$420, this is the splurge pick for anyone who genuinely spends extended time outdoors in serious cold rather than moving between heated spaces.
How to Use Your Interchange Jacket’s Zip-In Liner: A Practical Guide
Getting the most out of the zip-in system takes more than just yanking the two pieces together the first cold morning. Start by checking zip-in liner compatibility before you buy anything separately — most interchange systems only guarantee a proper zip-in fit within their own product line, so a Columbia liner generally won’t zip cleanly into a North Face shell, even when the zippers look similar at a glance. If you ever plan to buy shell and liner as separate pieces down the road, confirm they’re listed as a matched interchange set, not just two jackets from the same brand’s broader catalogue.
During the first 30 days, the most common mistake is forcing a misaligned zipper track, which can bend the slider and ruin the compatibility permanently — line up the bottom corner first, then zip upward slowly. Wash the shell and liner separately, and always according to their individual care labels; combining them in one wash cycle is a common shortcut that can strip the shell’s water-repellent coating faster than normal wear would. When storing for the season, hang both pieces separately rather than folded together in a bag, since down and synthetic liners lose loft — and therefore warmth — when compressed for months at a time.
A quick maintenance habit worth adopting: reproof the shell’s DWR coating once a season with a spray-on treatment once water stops beading on the surface and starts soaking in instead, which is the clearest visual sign the coating is wearing thin.
Real-World Scenarios: Matching an Interchange Jacket to Your Winter
Picture three different Canadians, three different winters, three different right answers. First, a transit commuter in Toronto who’s outside for maybe fifteen minutes at a stretch between the subway and the office door, on a moderate budget: the Columbia Eager Air Interchange 3-in-1 Jacket fits that pattern well, balancing everyday warmth with a price that doesn’t sting if a sleeve gets caught in a subway door.
Second, a Prairie parent doing daily school drop-offs and driveway shovelling in Regina, facing genuine -30°C wind chill mornings for weeks at a time: that’s squarely the use case for the Columbia Whirlibird IV Interchange Jacket or the Eddie Bauer Powder Search 2.0 3-In-1 Down Jacket, both built around sustained deep-cold exposure rather than brief outdoor stints.
Third, someone in Victoria or coastal New Brunswick where January often means rain and 4°C rather than snow and -15°C: the Helly Hansen Squamish CIS 3-in-1 Jacket is the obvious fit, since its whole design philosophy is built around staying dry through sustained wet weather rather than maximizing insulation for dry cold. Matching the jacket to the actual climate — not the calendar month — is the single biggest factor in whether an interchange jacket earns its price tag.
✨ Layering season is here! ❄️
Browse the full interchange jacket lineup on Amazon.ca and lock in your size before the best colourways sell out for the season!
How to Choose an Interchange Jacket for Canadian Winters
Picking the right one comes down to matching a handful of specific factors to your actual life, not just your climate zone. Here’s the reasoning behind each step, in the order it actually matters.
- Start with your typical exposure time. Fifteen minutes between transit stops needs far less insulation than an hour of shovelling or dog walking, so match the liner type to how long you’re actually outside, not the coldest temperature on the forecast.
- Weigh rain against dry cold. A shell built around sustained wet weather, like Helly Tech Protection, performs differently than one optimized for dry sub-zero cold, so be honest about which one describes your actual winter.
- Check zip-in liner compatibility before buying pieces separately. As MEC’s guide to choosing mid-layers points out, a liner’s warmth and fit depend on how well it’s actually engineered to pair with its shell, not just whether the zippers superficially match.
- Decide how much you’ll actually use the shell-only mode. If you live somewhere with a long shoulder season, the shell’s stand-alone performance in light rain matters as much as the combined jacket’s deep-cold performance.
- Match insulation type to your activity level. Down and reflective linings excel when you’re stationary; fleece breathes better when you’re generating your own heat through movement.
- Budget for reproofing, not just the purchase price. Every shell in this category eventually needs a DWR refresh, so factor that modest ongoing cost into the total value equation.
- Confirm sizing over your typical layers. Try the combined jacket over what you’d actually wear underneath, not just a t-shirt, since fit over bulk varies more between brands than spec sheets suggest.

Interchange Jacket vs Single-Shell Winter Parka
The honest comparison isn’t “which is better” — it’s which trade-off suits your life. A single-shell parka is built around one consistent warmth level, typically pushing harder on peak-cold performance than any interchange system can match at a similar price point, since all the insulation budget goes into one piece rather than being split across two.
| Factor | Interchange Jacket | Single-Shell Parka |
|---|---|---|
| Versatility across seasons | Wears 3 ways: shell, liner, or combined | One warmth level only |
| Packing and travel | Liner packs separately for easier layering | Bulkier, harder to adjust for mild days |
| Cost over time | One purchase covers roughly three seasons of use | Often needs a second lighter jacket for shoulder seasons |
| Peak-cold performance | Slightly below a dedicated expedition parka | Often warmer at extreme lows, such as -30°C and below |
| Best For | Variable climates, commuters, shoulder-season transitions | Consistently cold regions, minimal-fuss dressing |
Reading across that table, the interchange format wins on flexibility and long-run value for anyone dealing with genuine seasonal swings, while a dedicated parka still edges it out for raw warmth in consistently extreme cold. As Health Canada’s guidance on extreme cold notes, dressing in layers that trap air is one of the most effective ways to retain body heat regardless of which outer system you choose, which is really the underlying principle an interchange jacket is built around.
Common Mistakes When Buying an Interchange Jacket
- Buying based on liner warmth alone. A heavily insulated liner paired with a weak shell still lets wind and moisture through, undermining the whole point of the system.
- Ignoring the shell’s rain performance. Plenty of buyers focus entirely on cold-weather specs and skip checking whether the shell handles sustained rain, which matters enormously in coastal regions.
- Skipping the fit-over-layers check. A jacket that fits perfectly on its own can feel restrictive once you add a sweater and the liner together.
- Assuming all interchange systems are cross-compatible. As covered above, zip-in liner compatibility is almost always brand- and model-specific, not universal.
- Overbuying insulation for a mild climate. A deep-cold liner like the Whirlibird’s Omni-Heat Infinity is genuinely wasted warmth — and unwanted bulk — in a Vancouver or Victoria winter.
What to Expect: Real-World Performance in Canadian Winters
Spec sheets describe lab conditions; real winters involve wind, wet sidewalks, and the specific misery of a delayed bus. In practice, a quality shell like Omni-Tech, DryVent, or Helly Tech Protection genuinely keeps you dry through a 20-minute wait in wet snow, but no shell eliminates the bite of wind chill entirely — that’s the liner’s job, and it’s why matching liner type to your actual exposure time matters more than chasing the single warmest option on paper.
Expect combined jackets to feel noticeably warmer than the sum of their parts thanks to the trapped air layer between shell and liner, a detail spec sheets rarely explain well. Expect zippers to stiffen in extreme cold below roughly -20°C, which is normal across every jacket in this guide, not a defect specific to one brand. And expect the liner-only mode to get real use in a Canadian shoulder season — reviewers across nearly every product in this guide mention wearing the liner alone far more often than the marketing photos suggest, simply because Canadian fall and spring rarely commit to one temperature for more than a few days at a time.
Top Interchange Jacket Brands Trusted by Canadians
Not every brand approaches interchange jacket brands the same way, and the differences go beyond just price. Columbia leans on Omni-Tech and Omni-Heat as its core proprietary technologies across a wide range of price points, making it the most accessible entry into the category with strong availability across Canadian retailers and amazon.ca specifically. The North Face positions itself as the durability-first premium option, with DryVent shells built to outlast several winters, backed by a long-standing reputation that shows up repeatedly in owner loyalty.
Helly Hansen carries genuine Norwegian marine and workwear heritage into its outerwear, which is exactly why its shells consistently outperform on sustained wet-weather protection rather than dry cold. Marmot occupies a slightly different niche, leaning into technical, activity-focused design with Polartec fleece liners aimed at people who move rather than stand still. Eddie Bauer sits at the premium end specifically through its use of real down insulation, a genuine step up in warmth-to-weight over synthetic alternatives. Free Country, by contrast, plays the accessible entry-level role, prioritizing an affordable way to try the interchange format without the commitment of a premium shell.
Cold-to-Mild Transition Wear: Getting the Most from Your 3-in-1 Through Shoulder Seasons
This is genuinely where an interchange jacket earns its keep. Cold-to-mild transition wear is the whole reason the format exists — those six-ish weeks each October and April when a heavy parka is obviously overkill but a single light shell leaves you cold the moment the sun dips. Splitting your jacket into shell-only mode for a 10°C rainy morning, then zipping the liner back in for an unexpected cold snap the same week, is exactly the flexibility a single-warmth-level coat can’t offer.
Practically speaking, keep the liner accessible rather than packed away once the calendar hits October — Environment Canada’s own shoulder-season forecasts swing widely enough that reattaching it with 15 minutes’ notice beats digging through a closet. The Canadian Red Cross’s cold-weather safety tips specifically recommend dressing in adjustable layers during unpredictable weather, which lines up precisely with how an interchange system is meant to be used rather than treated as a single fixed outfit. Buyers who get the most long-term value from these jackets tend to be the ones who actually use the three-way versatility instead of leaving the two pieces zipped together from November through March out of habit.
Frequently Asked Questions
❓ What is an interchange jacket?
❓ Are interchange jackets warm enough for Canadian winters?
❓ Can I buy the shell and liner separately for an interchange jacket?
❓ What is the best interchange jacket brand for Canada?
❓ How do I wash a 3-in-1 interchange jacket?
Conclusion: Choosing the Right Interchange Jacket for Canadian Winters
There’s no single best interchange jacket for canadian winters — there’s only the best one for your specific mix of climate, budget, and how long you’re actually outside on a given day. The Columbia Eager Air Interchange 3-in-1 Jacket remains the safest all-around starting point for most buyers, the Helly Hansen Squamish CIS 3-in-1 Jacket earns its price for anyone battling coastal rain more than dry cold, and the Eddie Bauer Powder Search 2.0 3-In-1 Down Jacket justifies its premium the moment you’re facing genuine extended sub-zero exposure.
What matters most is being honest about your actual winter rather than shopping for the coldest day of the year you might experience twice. Match the shell to your moisture exposure, match the liner to your activity level and how long you’re outdoors, and actually use the shell-only mode during those unpredictable shoulder-season weeks instead of leaving the two pieces zipped together out of habit. Do that, and one well-chosen interchange jacket can genuinely replace two or three single-purpose coats in the closet.
✨ Ready to stop layering guesswork and start dressing for the weather you’re actually getting? Check current prices and availability on Amazon.ca today! 🧥❄️
Recommended for You
- Convertible 3-in-1 Jacket vs Separate Layers: 7 Best Picks (2026)
- Long Winter Coat for Men: 7 Best Picks for 2026 (Ranked)
- 7 Best Wool Winter Coat For Women Options in Canada (2026)
Disclaimer: This article contains affiliate links. As an Amazon Associate, I earn from qualifying purchases. If you purchase products through these links, we may earn a small commission at no additional cost to you.
✨ Found this helpful? Share it with your friends! 💬🤗
